Overview
Using this feature, you will be able to a load balanced environment.
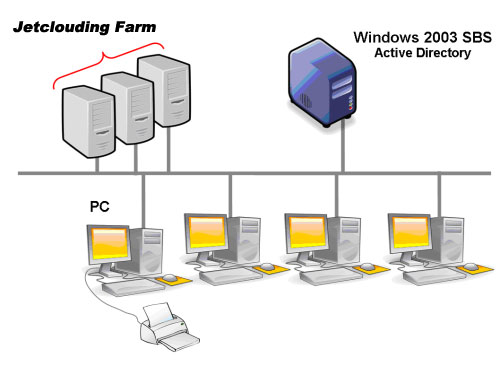
It means that the load of all your users will be distributed between your servers. The workload will be shared between all the servers of your farm.
Load Balancing enables to use up to 20 servers with load balancing. This very powerful and advanced capability is to be used when a large number of users/servers has to be deployed.
Usually we recommend using one server for 50 concurrent users. For standard commercial application written in VB, C, C++, Delphi or Uniface you can go up to 100 concurrent users especially if you decide to use XP 64 bits which, according to our experience, tops most operating systems delivered by Microsoft. XP or Windows 7 are much more stable operating systems. For W7, we recommend to use the 64 bits version.
Generated Clients and Web Access
There are two ways to connect to a Load Balanced cluster:
- Using a Generated Client (executable program, created by the Connection Client Generator)
- Using a Gateway Portal Web Access (web page in the browser, created by the Webmaster Toolkit)
Please note that the Gateway Portal is only enabled in Jetclouding Corporate edition.
This page describes how to use the Load Balancing Manager for use with a Generated Client.
Load Balancing Manager
Use the Admin Tool to specify Load balancing/Failover parameters, by clicking on the “Load Balancing” tile in order to launch the Load Balancing Manager.
The main window of the Load Balancing Manager displays a lot of data and allows you to configure Load Balancing on your system.
It lists all the servers in your Load Balanced server farm, and allows you to add, edit or remove them.
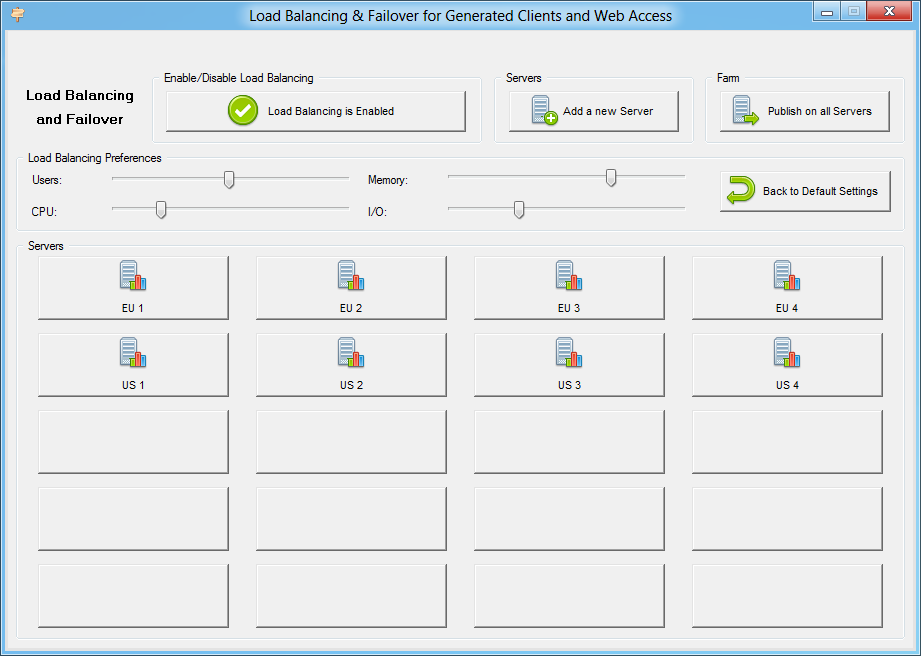
The sections “Enable/Disable Load Balancing” and “Load Balancing Preferences” of the window are only used for Gateway Portal Load Balancing. Do not use them if you plan to use Load Balancing with Generated Clients only.
Adding a new Server
To add a new server, simply click on the “Add a new Server” button. The following window will be displayed:
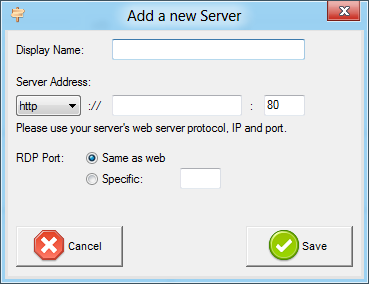
When using a Generated Client the “Display Name” and the protocol will not be used. They are only used when connecting using a Gateway Portal. However, we advise you to choose an explicit “Display Name”, in order to improve the readability of the list of servers.
For the “RDP Port”, you can choose to use the same port as the Web server (by default), or choose to check “Specific” and specify your own RDP Port.
Editing an existing Server
To modify an existing server, simply click on the server that you want to update. The following window will be displayed:
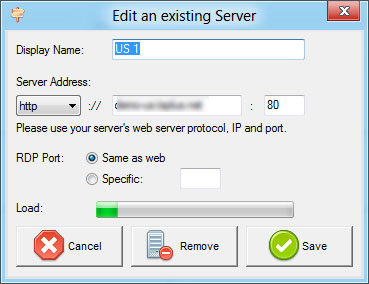
The “Load” of the server will only be displayed if you have a Jetclouding Corporate edition. Do not worry if it displays a red “Unable to connect”, it is not a problem if you plan to use Load Balancing only with Generated Clients.
Publishing your modifications on all the Servers of your Farm
No need to copy the loadbalancing.ini configuration file on all your servers!
Once you have done all the modifications that you wanted to do, do not forget to click on the “Publish on all Servers” button.
By clicking this button, you will automatically send the new load balancing settings to all the servers of your farm.

