Using the Webmaster Toolkit, you will be able to create your own customized HTML Web Access pages – and there is no need to be a web developer!
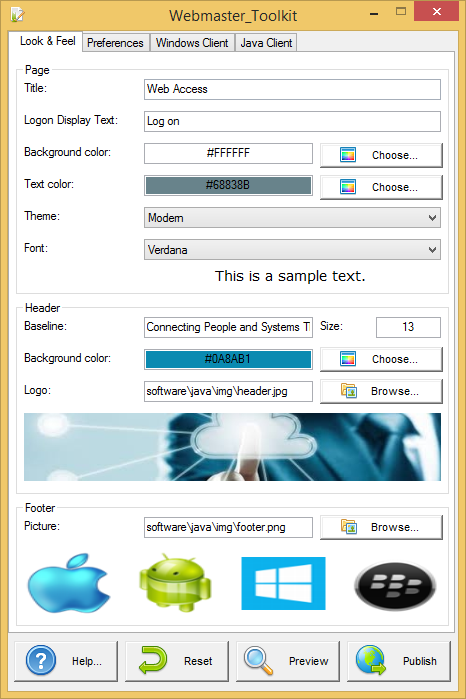
Look & Feel tab
This tab is the first and main tab.
You will be able to customize all the display and graphic settings, as well as adding your own logo.
Some advanced tips:
- You don’t have to click on a “Choose…” button if you already know a color code: just type it in the input.
- Be careful with the real size of the pictures: your page could be quite bad-looking if a picture is too big.
- Do not hesitate to use the “Preview” button on the bottom, it’s fast and easy!
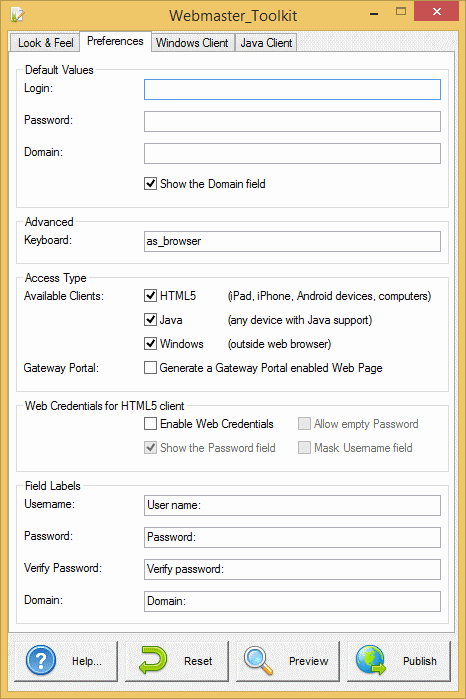
Preferences tab
This tab allows you to configure the Web Access in the page:
- “Default Values”: you can specify a default login, password and/or domain that will be pre-filled in the page.
- “Show the Domain Field”: when checked, the Domain is asked to the user, otherwise it is not displayed.
- “Keyboard”: only for advanced administrators who are facing special keyboard issues.
- “Available Clients”: choose 1 to 3 types of web connection clients. If more than 1 are checked, the user will have the choice.
- “Gateway Portal”: check it to activate the Gateway Portal features (such as the Gateway Portal Load Balancing and the Gateway Portal Users/Servers Assignments).
You can also change the labels for every input field in the page in the “Field Labels” section at the bottom of the window.
The “Web Credentials” section allows you to enable (or disable) the Web Credentials feature for HTML5 client.
As this feature is HTML5-only, checking it will automatically disable any other type of client in the “Access Type” section.
When using Web Credentials, you might want to allow empty passwords. If you only have Web Credentials with empty passwords, we recommend that you uncheck the “Show Password Field” option, in order to simplify even more the web login page.
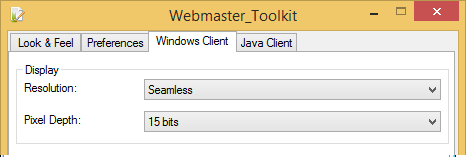
Windows Client tab
This tab is for Windows clients specific settings.
You can modify the Resolution and the Pixel Depth.
As you will notice, “Resolution” can be a bit more than just a standard screen resolution: you can also choose between different Seamless/RemoteApp options (remote connection without the remote desktop).
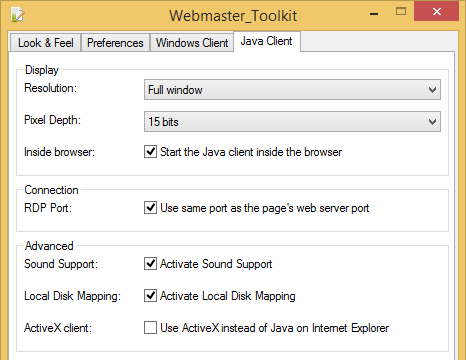
Java Client tab
This tab is for Java clients specific settings.
As in the Windows Client tab, you can modify the Resolution and the Pixel Depth.
Moreover, in this tab you can also choose to activate:
- Sound Support (sounds on the remote server are transmitted to the client’s speakers)
- Local Disk Mapping (access of the client’s disk on the remote server)
- ActiveX client (Java replacement, ActiveX only works in Internet Explorer)
Saving typed values and Resetting to default ones
When you close the Webmaster Toolkit, all the values you typed and checked are saved.
If you want to reset these values to values by default, click on the “Reset” button on the bottom.
Generating the HTML Web Access page
We advise you to try a “Preview” before generating a new HTML Web Access page.
Once you are pleased by the preview, then you can click on the “Publish” button to generate and publish the page to your web server’s root folder.
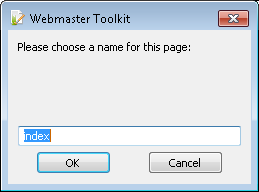
You will be asked for a page name. If you want to overwrite your default page, use “index”. In this case, the newly published web page will be accessible at: http://your-server.com/index.html